In my experience, rarely is the proper selection, installation, and maintenance of a gasket actually practiced in the real world. Many times, I hear, “The gasket failed.” The reality is that it’s not the gasket’s fault.
Jeff Arnold is the director of business development for gasketing/sealing and a hose specialist for Motion Industries. Having earned multiple certifications, Arnold has 44 years of field experience in gasketing; sealing; pump/valve packing; and hose, rubber, and conveyor belting, working with applications across the industry.
Full gasket engineering selection and technical installation training is available by engaging a trained gasket specialist, but knowledge of several key components can go a long way toward extending uptime. Here are three real-world gasketing problems corrected.
1. Problem: Wrong gasket selection. A common mistake is pulling gaskets off the shelf, or gasket board, and putting them into service without knowing what the gasket really is. Many materials look alike; a gasket might look like the one being replaced, and it may be the wrong type.
Solution: Make proper gasket selection. Use the established gasket style specified for that application. A qualified gasket specialist can help you update to the latest materials and consolidate the many different styles usually found in inventory.
2. Problem: Not cleaning sealing surfaces or inspecting for damage. This practice can lead to immediate leak paths.
Solution: Ensure clean and nondamaged surfaces. This simple yet important action allows nonmetallic gaskets to form into the pores of the flange surface, achieving a holding pressure.
3. Problem: Not following proper installation processes and using inappropriate bolting components. The gasket will not reach the engineered seating stress for which it was designed to seal. Reusing old and damaged bolts causes more friction and will cost you the seating force needed to apply seating stress on the gasket.
Solution: Don’t cut corners. Follow the specified installation procedure and use correct and undamaged bolting hardware for the application. Over the long term, you’ll save time and costs because your risk of failure will greatly decrease. Use new industry standard grade A193 B7 or stronger bolts, because weaker or well-used bolts get overstretched. Bolts are designed by grade to stretch and act as springs to hold the flanges together. If you plan to reuse the bolts, they must first be cleaned and inspected.
Also, use XH washers on both sides. The nuts need to slide and not dig into the flange bolt holes to achieve the gasket seating stress needed. Lubricate the bolts, nuts, and washer surfaces to overcome friction. This will achieve the seating stress needed on the gasket. Gaskets and bolts do relax. Only when safe and possible, retighten 12–24 hours after installation. Finally, never lubricate the gasket or sealing surface!
[sidebar id="5"]
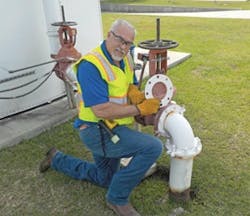
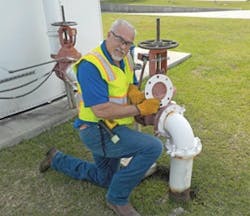
For example, in the image at right, the 6” 150# flange in water service had been leaking since the first gasket was installed, and rust stains showed the leak area and leak path. Because the leaking was isolated to one bolt area at the top, it appeared that one bolt was not tightened to the proper torque on installation, and the leak continued to get worse. The solution was to shut down the system, lock all involved out of the system for safety, and remove the old gasket. The next step was to clean the sealing surfaces, use new bolts, nuts, and HX washers of grade B7 or above, and lubricate only the bolts, nuts and washers. (And follow the manufacturer’s suggested installation procedures.)
A gasket specialist can help with correct installment and bolting and even supply in-field printed and laminated installation instructions, tightening instructions, and bolting charts. Knowledge gained from proper training will reduce the risk of improper gasket selection and installation. However, if you’re only able to accomplish these best practices listed above, you’re much closer to having no gasket failures.


