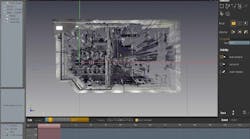
For facilities constructed prior to CAD modeling, little or no documentation of what was constructed exists, or, in many cases, the documentation doesn’t accurately match the existing structure. The lack of documentation can cause delays in retrofit projects, where builders need exact dimensions of existing structures in order to understand what needs to be constructed.
Traditionally, engineering and construction methods rely on the collection and assembly of information from existing drawings and manual field measurements to produce updated CAD models; however, this method can be both time-consuming and costly.
Figure 1. Scanners are line-of-sight devices, so they must be repositioned a few times to capture dimensions blocked by solid objects. Integrating laser scanning into the workflow has allowed collection of as-is conditions in undocumented facilities.
At Construction Management and Design Services (CMDS), we’re based in Cypress, California, and we specialize in design and project/construction for food and beverage facilities, utilizing 3D laser scanning technology. By integrating laser scanning into the workflow, we’ve been able to collect as-is conditions of undocumented facilities (Figure 1).
Prior to implementation of laser scanning technology into our workflows, we used a combination of tape measures, laser levels, transits, levels, plumb bobs, and laser range finders to collect measurement data of structures varying in size from 1,000 to 100,000 sq ft. In addition to being a time-consuming and tedious process, these methods exposed projects to delays in scheduling and financial risks due to potential inaccuracies in the data.
During the process of gathering measurement data using these older manual methods, the odds of missing a critical measurement are enormous. Neglecting to collect a vital measurement can be a costly error, requiring additional time and money to return to the facility to recapture the missing information. For example, imagine collecting data at a plant in Baldwinsville, New York, and, after returning to the home office in Cypress, California, the team realizes they missed a critical measurement. The additional travel and accommodation expenses could be the difference between a profit and a loss, or, even worse, the delay could result in missing a scheduled deadline.
After evaluating several solutions, we determined the Faro Laser Scanner provided the ease of use, lower cost, and portability necessary for our line of work. The portability of the unit, compared to other terrestrial scanners, allows us to transport or ship the unit across the country to any project site. And there’s no need to connect to a laptop to store the scan data.
The laser scanner’s comprehensive data collection eliminates the need for return trips to a plant for additional measurements, and the data collected provides a permanent record that can be used many times over in future design projects. For example, we often use the point cloud data collected using the Faro Laser Scanner in facility management projects to show the exact location of various machinery (Figure 2). The data helps clients to quickly identify component failures, while minimizing plant downtime (Figure 3).
Figure 2. Point cloud data can be used in facility management projects to show the exact location of various machinery.
Figure 3. Data helps to quickly identify component failures, while minimizing plant downtime.
In a recent project at a beverage manufacturing plant, we were tasked with relocating a 24 oz can filler and packaging line to another plant. The floor plan of the original location of the 24 oz can line was completely different than the proposed location, where a 12 oz bottle filler and packaging line needed to be removed prior to the new system’s installation. Scanning both the bottle and can line facilities, the design team was able to determine which parts of the existing system could be used in the new design and how to fit the 24 oz packaging components in the new location.
| Vernon Jensen is president and owner of Construction Management and Design Services in Cypress, California. Contact him at (714) 761-1464. |
Traditional methods would have required four engineers to spend five to 10 days each documenting the facilities. By using the Laser Scanner, we were able to save more than 180 man-hours, cut the number of engineers needed in half, and spend only one day each at the plants.
The Faro Laser Scanner allows us to deliver accurate 3D models to help to expedite the as-build documentation process. We’ve seen a tenfold increase in the consistency and service of our workflow. Time is money. The best thing about laser scanning is there’s virtually no way to miss a measurement. Going back to a location to gather information can be very costly, depending on the distance. We don’t have to do that because we capture everything the first time.
